Wavefrontで学ぶ分散トレーシング Part-2
この文章は、Wavefrontで学ぶ分散トレーシング シリーズの第二回目です。
シリーズ
第一回 : 概要編
第二回 : Spring Bootで分散トレーシング ← いまここ
第三回 : REDメトリクスって何?
第四回 : サービスをつなげてみる
第五回 : Pythonで分散トレーシング
第六回 : AMQPで分散トレーシング
第七回 ; サービスメッシュで分散トレーシング
始めに
この回では、まずは手取り早くWavefrontの分散トレーシングを知っていただくためSpring Bootを使ったアプリケーションを紹介します。 なお、プログラミング経験ですが、皆無で大丈夫です。筆者自身インフラエンジニア出身なので、複雑なコードはかけません。
準備編
Spring BootはJavaのフレームワークです。そのため、最低限以下が必要です。
- Java JDK 8+
Oracle JDKに従いJDKをインストールしてください。 今回はこれだけでOKです。 なお、本来は、エディターも必要ですが、今回のレベルであれば、なしでできるのであえて割愛します。 また、今回の内容はすべて無料でできますのでご安心ください。
ソースコード
ここに公開しています。
https://github.com/mhoshi-vm/wf-demanabu-dis-tracing/tree/master/2
アプリの準備
準備ができたら、以下のURLにアクセスしてください。
ログイン後、以下を実施します。
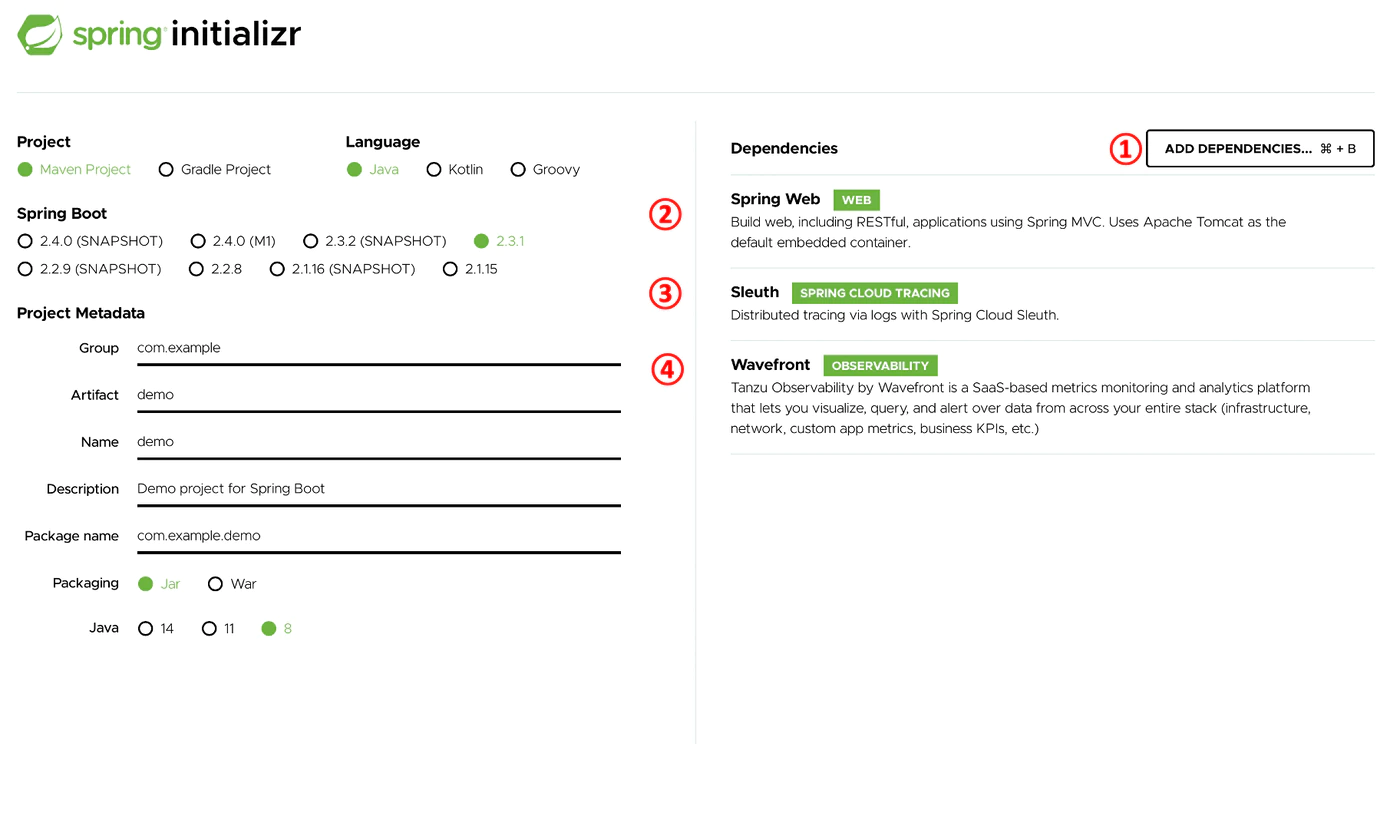
- Add Dependencies を選択
- Spring Webを検索して追加
- Sleuth も同様に追加
- Wavefront も同様に追加
最後にGenerateをクリックします。 すると、zipファイルのダウンロードされるので、どこでもいいので展開してくだい。 展開後、以下のようなファイル構造になっているかと思います。
 1mhoshino@mhoshino demo % tree
 2.
 3├── HELP.md
 4├── mvnw
 5├── mvnw.cmd
 6├── pom.xml
 7└── src
 8    ├── main
 9    │   ├── java
10    │   │   └── com
11    │   │       └── example
12    │   │           └── demo
13    │   │               └── DemoApplication.java
14    │   └── resources
15    │       ├── application.properties
16    │       ├── static
17    │       └── templates
18    └── test
19        └── java
20            └── com
21                └── example
22                    └── demo
23                        └── DemoApplicationTests.java
24
2514 directories, 7 files
Javaのコードを少しだけ編集します。 お気に入りのエディターで以下のファイルを開いてください。
1mhoshino@mhoshino demo % vi src/main/java/com/example/demo/DemoApplication.java
これを以下の内容に差し替えてください。
 1
 2package com.example.demo;
 3
 4import java.util.Map;
 5
 6import org.slf4j.Logger;
 7import org.slf4j.LoggerFactory;
 8import org.springframework.boot.SpringApplication;
 9import org.springframework.boot.autoconfigure.SpringBootApplication;
10import org.springframework.http.ResponseEntity;
11import org.springframework.web.bind.annotation.GetMapping;
12import org.springframework.web.bind.annotation.RequestHeader;
13import org.springframework.web.bind.annotation.RestController;
14
15@SpringBootApplication
16public class DemoApplication {
17
18	public static void main(String[] args) {
19		SpringApplication.run(DemoApplication.class, args);
20	}
21
22}
23
24@RestController
25class HelloRestController {
26
27	private static final Logger LOGGER = LoggerFactory.getLogger(HelloRestController.class);
28
29	@GetMapping("/hello")
30	public ResponseEntity<String> hello (@RequestHeader Map<String, String> header){
31		printAllHeaders(header);return
32		ResponseEntity.ok("Hello World!");
33	}
34
35	private void printAllHeaders(Map<String, String> headers) {
36		headers.forEach((key, value) -> {
37			LOGGER.info(String.format("Header '%s' = %s", key, value));
38		});
39	}
40}
さらに以下のファイルを開きます。
1mhoshino@mhoshino demo % vi src/main/resources/application.properties
そして以下の内容を追記します。
1management.endpoints.web.exposure.include=wavefront
2server.port=8081
3wavefront.application.name=demo
4wavefront.application.service=HelloRest
コード編集は以上です。上のコードが何をするかは後ほど説明します。
分散トレーシングを早速試してみる
それではアプリケーションを稼働させます。 以下のコマンドを実行してください。
1mhoshino@mhoshino demo % ./mvnw spring-boot:run
初回は起動までに時間がかかるかもしれませんが、二回目以降は早くなります。 そして以下のように出力されたら成功です。
 1  .   ____          _            __ _ _
 2 /\\ / ___'_ __ _ _(_)_ __  __ _ \ \ \ \
 3( ( )\___ | '_ | '_| | '_ \/ _` | \ \ \ \
 4 \\/  ___)| |_)| | | | | || (_| |  ) ) ) )
 5  '  |____| .__|_| |_|_| |_\__, | / / / /
 6 =========|_|==============|___/=/_/_/_/
 7 :: Spring Boot ::        (v2.3.1.RELEASE)
 8
 92020-07-15 10:24:49.985  INFO [hellorest,,,] 66556 --- [           main] com.example.demo.DemoApplication         : No active profile set, falling back to default profiles: default
102020-07-15 10:24:50.487  INFO [hellorest,,,] 66556 --- [           main] o.s.cloud.context.scope.GenericScope     : BeanFactory id=930eeca1-6f00-3004-b800-9fca9761a189
112020-07-15 10:24:50.831  INFO [hellorest,,,] 66556 --- [           main] o.s.b.w.embedded.tomcat.TomcatWebServer  : Tomcat initialized with port(s): 8081 (http)
122020-07-15 10:24:50.837  INFO [hellorest,,,] 66556 --- [           main] o.apache.catalina.core.StandardService   : Starting service [Tomcat]
132020-07-15 10:24:50.837  INFO [hellorest,,,] 66556 --- [           main] org.apache.catalina.core.StandardEngine  : Starting Servlet engine: [Apache Tomcat/9.0.36]
142020-07-15 10:24:50.914  INFO [hellorest,,,] 66556 --- [           main] o.a.c.c.C.[Tomcat].[localhost].[/]       : Initializing Spring embedded WebApplicationContext
152020-07-15 10:24:50.914  INFO [hellorest,,,] 66556 --- [           main] w.s.c.ServletWebServerApplicationContext : Root WebApplicationContext: initialization completed in 917 ms
162020-07-15 10:24:50.990  INFO [hellorest,,,] 66556 --- [           main] i.m.c.instrument.push.PushMeterRegistry  : publishing metrics for WavefrontMeterRegistry every 1m
172020-07-15 10:24:51.583  INFO [hellorest,,,] 66556 --- [           main] o.s.s.concurrent.ThreadPoolTaskExecutor  : Initializing ExecutorService 'applicationTaskExecutor'
182020-07-15 10:24:51.853  INFO [hellorest,,,] 66556 --- [           main] o.s.b.a.e.web.EndpointLinksResolver      : Exposing 3 endpoint(s) beneath base path '/actuator'
192020-07-15 10:24:51.889  INFO [hellorest,,,] 66556 --- [           main] o.s.b.w.embedded.tomcat.TomcatWebServer  : Tomcat started on port(s): 8081 (http) with context path ''
202020-07-15 10:24:51.908  INFO [hellorest,,,] 66556 --- [           main] com.example.demo.DemoApplication         : Started DemoApplication in 3.558 seconds (JVM running for 3.794)
21
22A Wavefront account has been provisioned successfully and the API token has been saved to disk.
23
24To share this account, make sure the following is added to your configuration:
25
26	management.metrics.export.wavefront.api-token=2b7543f5-2fc7-42ea-afdf-2c329a87d76e
27	management.metrics.export.wavefront.uri=https://wavefront.surf
28
29Connect to your Wavefront dashboard using this one-time use link:
30https://wavefront.surf/us/pGqpk9QCjb
別のプロンプトで以下のコマンドを数回、実行してください。
1mhoshino@mhoshino demo % curl localhost:8081/hello
うまくいっていればHello World!と出力されるはずです。
そして、しばらくしたら以下のURLを参照してください。
http://localhost:8081/actuator/wavefront
するとあら不思議、WavefrontのUIへ移動されます。

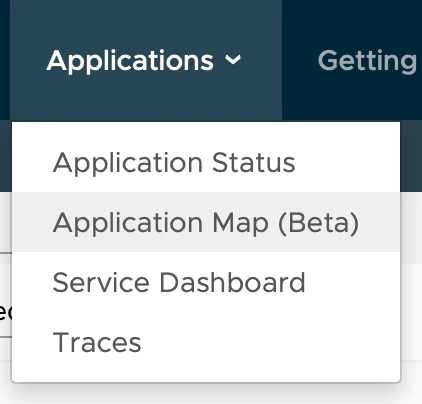
上のApplication > Application Map(Beta)を選択します。
何も表示されないかと思いますが
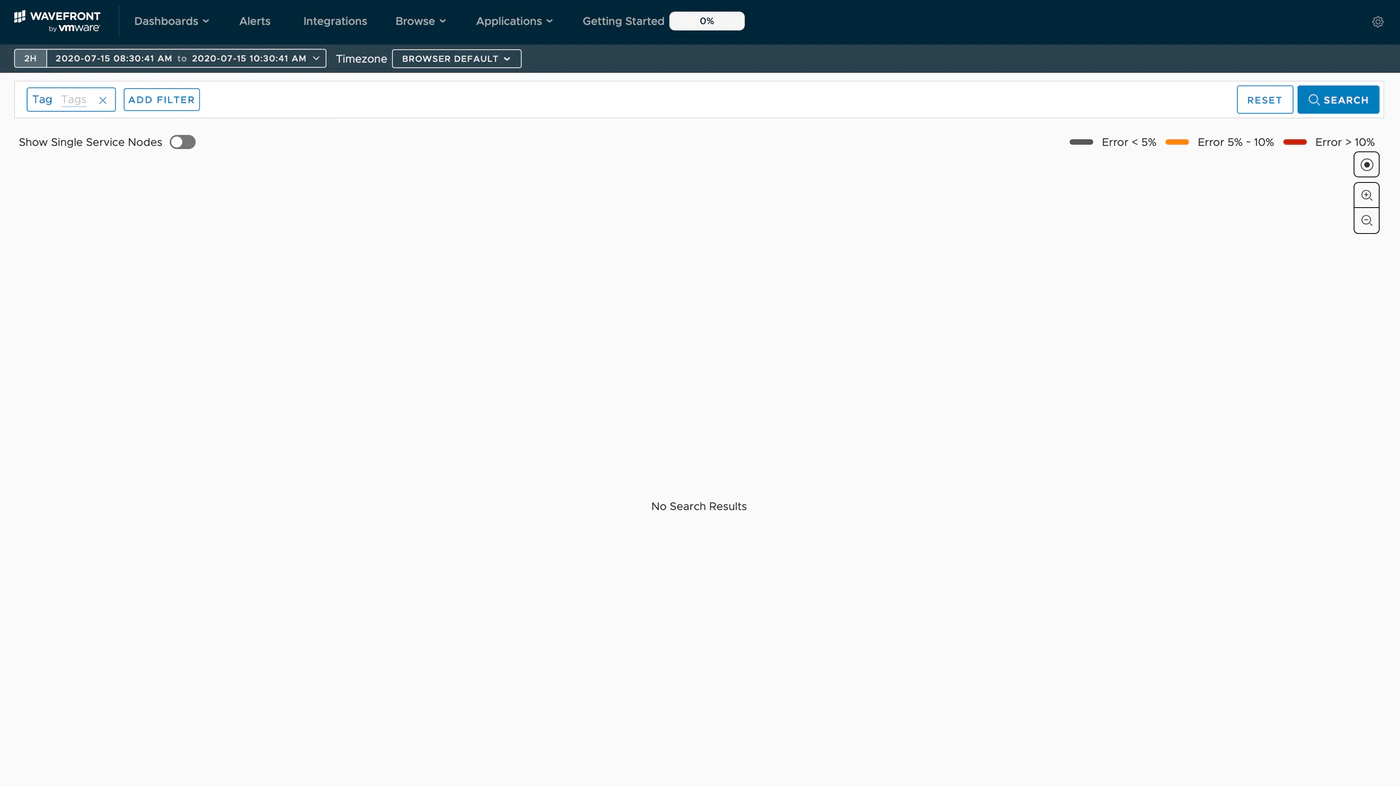
左上のShow Single Service Nodesを選択してください。

すると、今回のアプリケーションが表示されます。
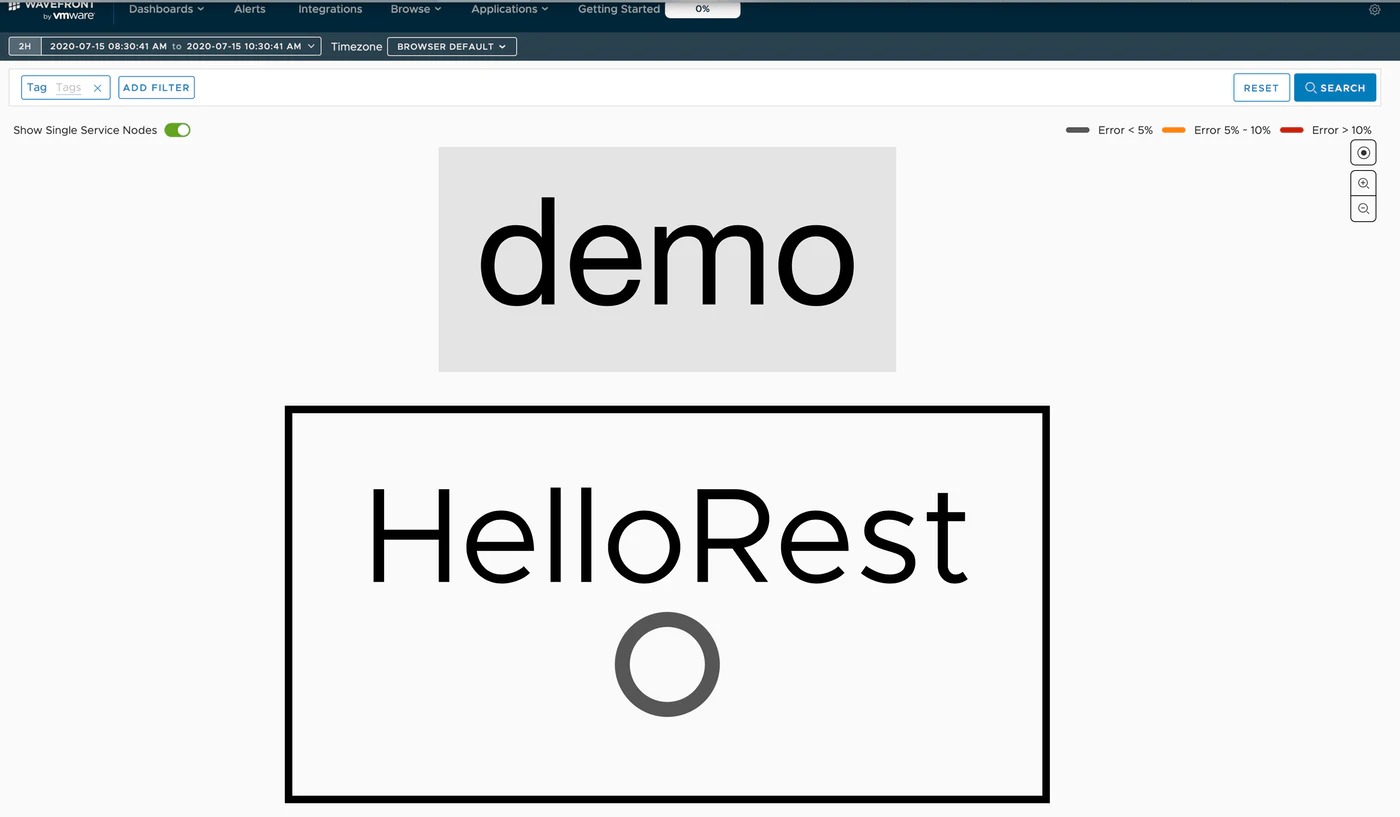
HelloRestをクリックして、View Traces For Serviceをクリックします。
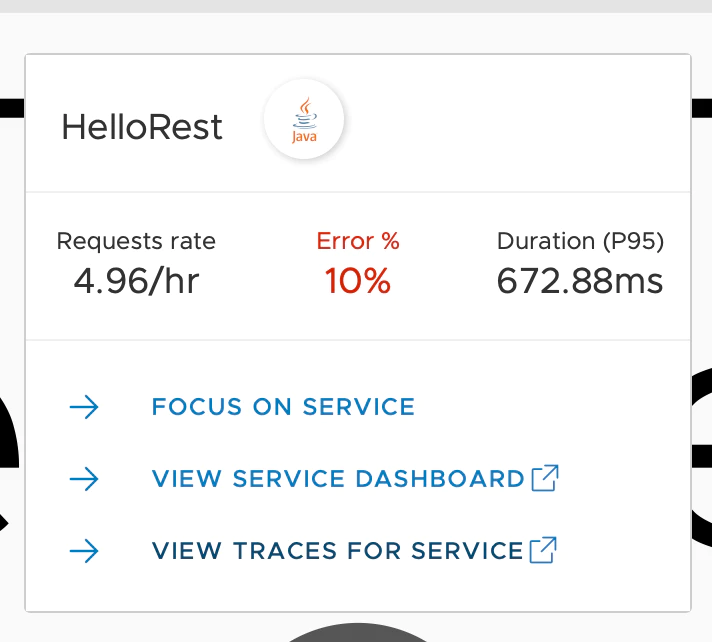
すると、Trace一覧が表示されます。
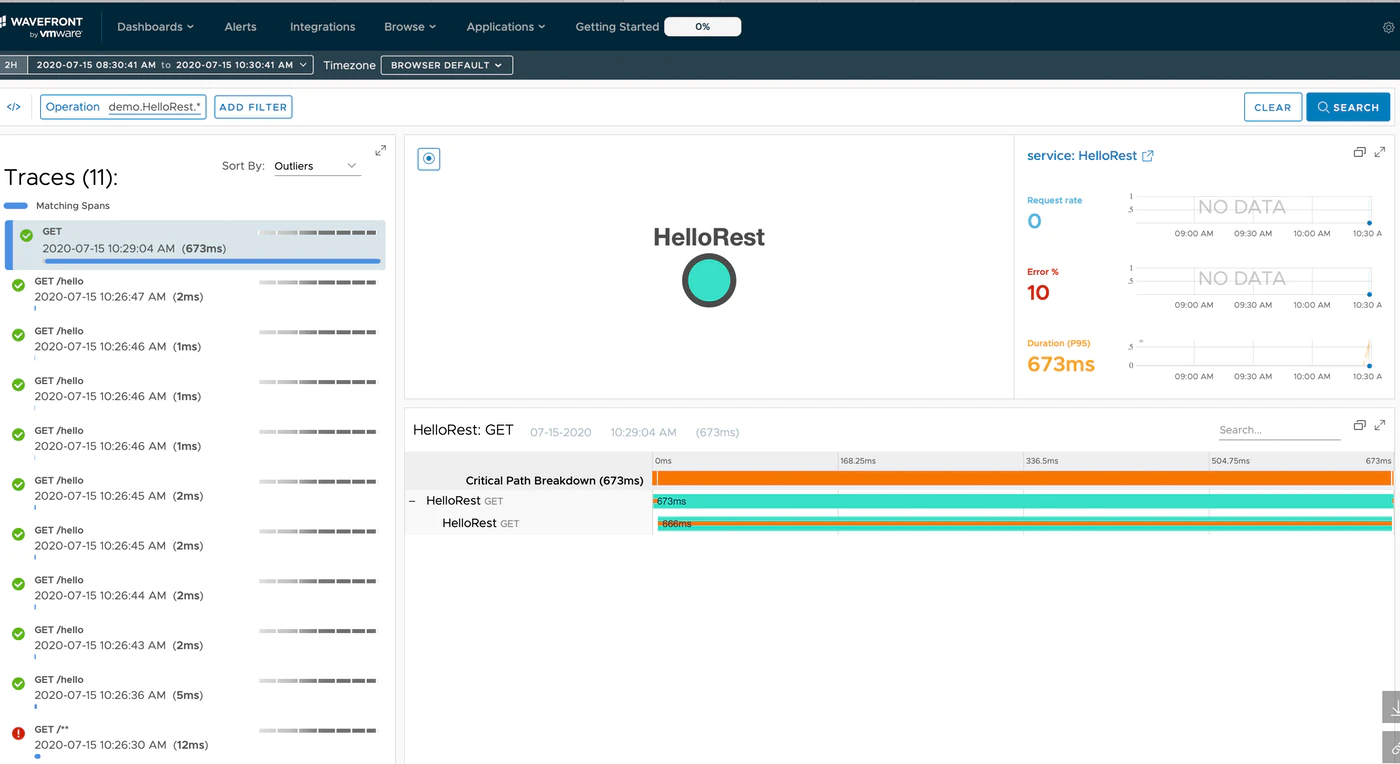
なんと、これで分散トレーシングを体験することができました。
ちょっと待って、何が起きている?
説明をほとんどせず、ここまできてしまいましたので、補足します。
まず、今回作成したアプリケーションは、結果にあるとおり、Hello World!と返すシンプルなREST APIアプリケーションです。
今回使用したSpring Bootは、このREST APIアプリケーションを簡易につくることのできるフレームワークです。 コード上は、いかの部分が、URLとREST APIを作成するための箇所です。
 1
 2@RestController
 3class HelloRestController {
 4
 5	private static final Logger LOGGER = LoggerFactory.getLogger(HelloRestController.class);
 6
 7	@GetMapping("/hello")
 8	public ResponseEntity<String> hello (@RequestHeader Map<String, String> header){
 9		printAllHeaders(header);return
10		ResponseEntity.ok("Hello World!");
11	}
12
13	private void printAllHeaders(Map<String, String> headers) {
14		headers.forEach((key, value) -> {
15			LOGGER.info(String.format("Header '%s' = %s", key, value));
16		});
17	}
18}
さて、コードそのものの説明は割愛しますが。。。気づいてほしい点として、Wavefrontとの連携箇所を表したコーディング箇所はほとんどないです。では、なぜWavefrontと連携できていたかというと、その前の手順にあったstart.spring.ioでの依存関係追加部分です。以下で言うところの② ~ ④の箇所です。

もうすこし、この依存関係が何をしているかについてですが、
- Spring Web : 今回作ったようなRESTサービスの雛形を提供
- Sleuth : 分散トレーシングの中心部分。それぞれのリクエストに対して、自動的にTrace、Span情報を付与してくれる。
- Wavefront : Wavefrontへの接続を行ってくれる。
Trace、Spanという単語が突然でてきましたが、概要編に記載したように
- Trace : 複数Spanがまとまったひとつの処理
- Span : 処理の単位。一般的には一つのRESTリクエストもしくはAMQPリクエスト
先ほど追加したSleuthが分散トレーシングの中心的な役割を果たしており、コードとは透過的に各HTTPリクエストに対して、Trace IDとSpan IDを付与しています。
アプリ側のログをみると、多分以下のようなログが表示されています。
12020-07-15 10:26:47.356 INFO [hellorest,5f0e5b575bea47a61ec9c6adc683de47,1ec9c6adc683de47,true] ...
この場合、5f0e5b575bea47a61ec9c6adc683de47がSleuthが追加したTrace IDであり、1ec9c6adc683de47がSpan IDです。
Wavefrontでも、このTrace IDとSpan IDがログから見えます。

さて、Wavefront側ですが、必要な設定は以下だけでした。
1spring.application.name=hellorest
2management.endpoints.web.exposure.include=health,info,wavefront
3server.port=8081
4wavefront.application.name=demo
5wavefront.application.service=HelloRest
この中で、wavefront.application.nameとwavefront.application.serviceがWavefront上でどのように表示されるかを制御しています。
この状態でアプリケーションを起動すると、自動でFreemium(無料)アカウントを作成され、利用可能となります。 Freemiumアカウントは本アカウントと比べると、様々な制約がありますが、試すには手っ取り早いと思います。
なお、http://localhost:8081/actuator/wavefront
のURLは自動でこのFreemiumアカウントにフォワードされます。
このURLはmanagement.endpoints.web.exposure.include=wavefrontと設定した場合に有効になります。
ここまで簡単に早くできるのは、Spring Bootのメリットです。のちに取り上げますが、他の言語だと結構大変です。 Spring Boot、WavefrontともにVMwareの配下にあり、連携が今後も強化される予定です。
まとめ
今回の内容についてまとめます。
- Spring Bootを使うとWavefront固有のコーディングなく連携ができる
- 分散トレーシングのTrace IDとSpan IDはSleuthがこれまたコーディングの必要なくやってくれる
- Wavefrontの接続は、Freemiumアカウントが勝手に作成され、すぐに利用できる
- Spring Boot + Wavefrontはなかなかに良い
次回 第三回は「REDメトリクスって何?」