Tanzu Platform Self Managed を試す - 利用者向け:Spaceへのデプロイ編
最新製品である Tanzu Platform のオンプレ版を試していきます。
ここではTPの利用者の運用方法を記載してきます。
シリーズ
- Install編
- 管理者向け:Projectセットアップ編
- ここ> 利用者向け:Spaceへのデプロイ編
- 管理者向け:デプロイ先の軽量化編
- 管理者向け:通信のHTTPS化
- 管理者向け:DNSへの自動登録
- 利用者向け:DB接続情報の管理編
おまけ:「Tanzu Platform の知らなくてもいい話」シリーズ
Spaceの作成
[Spaces] > [Overview]から[Create Space]を選択します。 適当な名前を与えつつ、Space Profiles では、app.tanzu.vmware.com を選択、AvailabiltiyTargetsはall-region.tanzu.vmware.comを選択します。
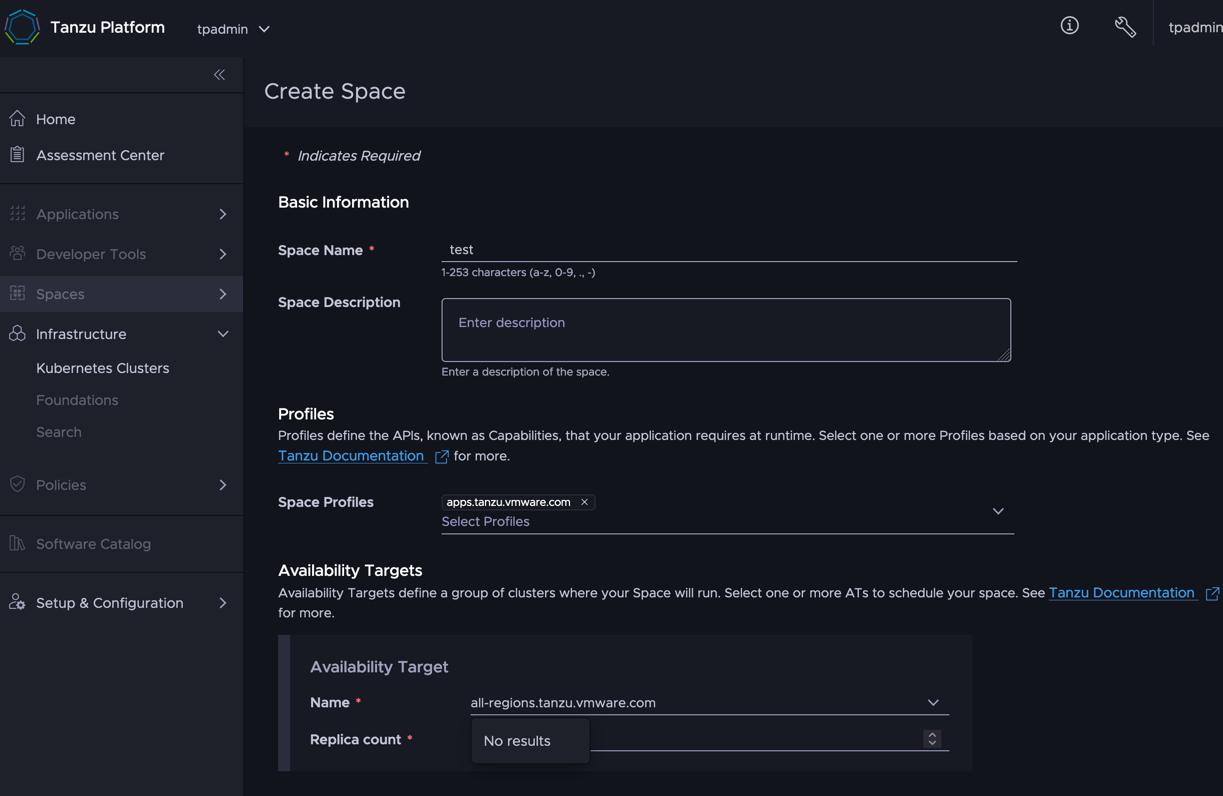
Healthyになるまでしばらく放置
デプロイ
前手順で作成したスペースがみえることを確認します。
1tanzu space list
スペースを使える状態にします。
1tanzu space use test
アプリを準備します。一応はポート8080で起動するアプリならすぐにテストできます。 手元にない場合、以下のコマンドで雛形アプリを作ってください。
1mkdir app
2cd app
3curl https://start.spring.io/starter.tgz \
4    -d dependencies=web,actuator | tar -xzvf -
ダウンロード後に、src/main/java/com/example/demo/DemoApplication.javaをいかにしてとりあえずのhello worldアプリにします。
 1package com.example.demo;
 2
 3import org.springframework.boot.SpringApplication;
 4import org.springframework.boot.autoconfigure.SpringBootApplication;
 5import org.springframework.web.bind.annotation.GetMapping;
 6import org.springframework.web.bind.annotation.RestController;
 7
 8@RestController
 9@SpringBootApplication
10public class DemoApplication {
11
12	public static void main(String[] args) {
13		SpringApplication.run(DemoApplication.class, args);
14	}
15
16	@GetMapping
17	String hello(){return "hello";}
18}
アプリの構成の初期化を行います。表示されるすべてのオプションはとりあえず、デフォルトでいいと思います。
 1% tanzu apps init
 2[i] Refreshing plugin inventory cache for "projects.packages.broadcom.com/tanzu_cli/plugins/plugin-inventory:latest", this will take a few seconds.
 3? What is your app's name? tp-learn
 4? Which directory contains your app's source code? .
 5? Select container build type to use for this app: buildpacks
 6? Should your app be accessible through HTTP? Yes
 7
 8✓ Created tanzu.yml
 9✓ Recorded app configuration to .tanzu/config/tp-learn.yml
10
11Hint: Use the "tanzu app config *" commands to further configure the application
Spring Boot 3からデフォルトでJava17以降しかサポートしないので、ビルド時の以下のオプションを指定します。
1tanzu apps config build non-secret-env set BP_JVM_VERSION=17
完了したらデプロイします。
1tanzu deploy
初めてのデプロイのときは以下でとまっているかのようにみえることがあります。 おそらくですが、ターゲットされたクラスタに対してmオフラインビルドパックダウンロードに時間がかかっているだけなのでと思うので気長(MAX 30分?)にまちます。 ちなみにですが、[ Developer Tools ] > [ Builds ] でも進捗が確認できます。
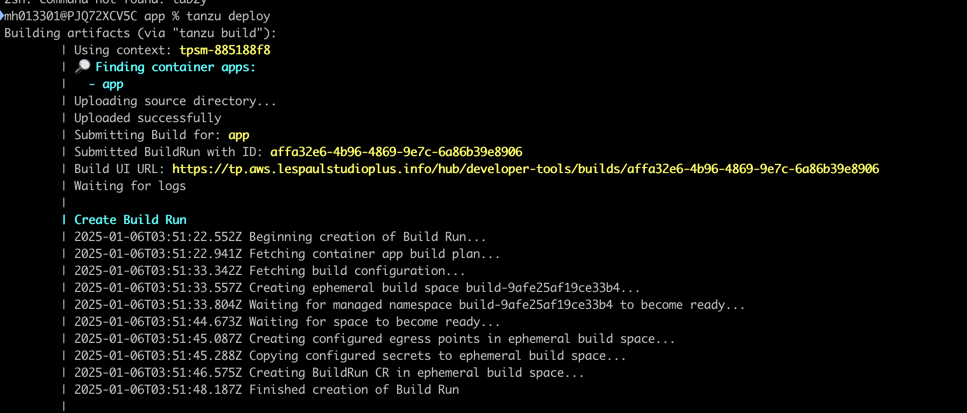
しばらくするとデプロイをする確認を求められるので “y” を入力します。

しばらくすれば、アプリケーションのデプロイ完了です。
アプリケーションへのドメインの紐付け
アプリケーションのドメインを紐づけていきます。[ Spaces ] > [ Overview ] > 該当のアプリを選択 > [ Ingress] を選択します。
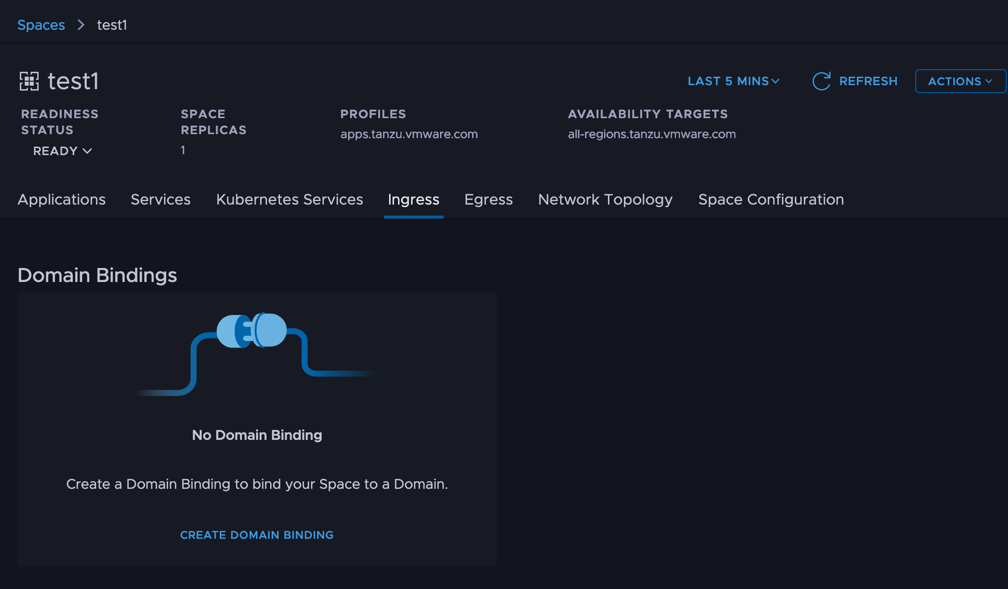
[ Create Domain Binding ] を選択します。Nameは適当でいいです。注意が必要なのが Advanced Configuration の Entry Point をmainからアプリ名にする必要がございます。
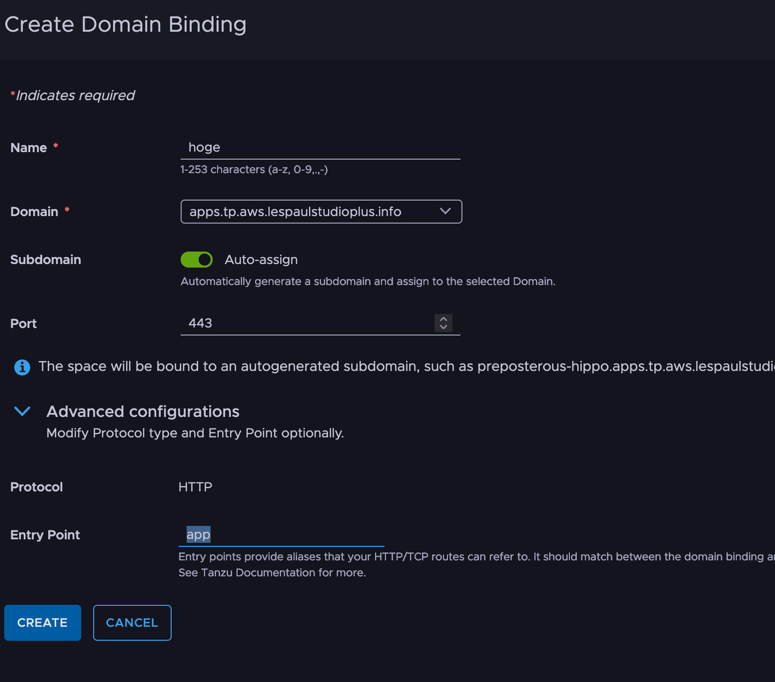
URL へ
ここまでくると、あとはURLに対して、応答があるか見ます。 別記事でとりあげますが、構成によって解決するべきアドレスが異なってきます。ここでは、以下の条件のもとでできる方法を紹介します。
- Run クラスタグループに対して、Kubernetes クラスタを一つしかアサインしていない
エンドポイントのURLは今のところCLIでなら取得できます。
1tanzu domain-binding list
で、確認した binding 名で以下を入力します。
1tanzu domain-binding get <domain binding名>
この中で、Addresses の値に接続可能なIPアドレスが表示されます。
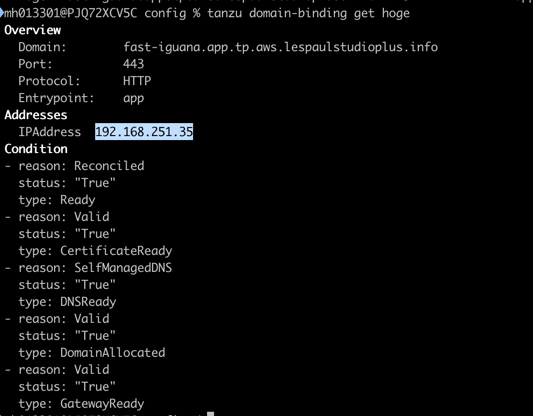
この状態で curl をすると応答が返ってきます。"-H" の host ヘッダーには、domainbindingsで返ってきた値を指定します。 IPアドレスは前コマンドにポート番号443を加えます。(ここまでの手順に従えば、暗号化なし)
1% curl -H "host: <domainbindingsでみた名前>" <前手順のIP>:443

以上アプリケーションのデプロイまで行いました。